Apple now ships a native container CLI tool for macOS — and yes, that means you can run Linux containers without Docker Desktop. Built on top of Apple’s Containerization Swift package and the Virtualization.framework, it spins up lightweight Linux VMs that run OCI-compatible container images with sub-second startup times. It feels native because it is native.
In this post, I’ll walk you through installing the container CLI, running your first container, allocating resources for heavy AI workloads, and troubleshooting a common macOS firewall issue that tripped me up the first time I used it.
Prerequisites
Before you begin, make sure you have:
- A Mac with Apple silicon (M1 or later)
- macOS 26 (Tahoe) or later
- Homebrew installed (install guide)
Installation
Installing the container CLI is as simple as running a single Homebrew command:
brew install container
Once installed, verify that everything is in place:
container --version
You should see the version number printed to the terminal, confirming a successful installation.
Starting the Container Service
Before you can run any containers, you need to start the container runtime service. This manages the background daemon that handles container lifecycle operations:
container system start
This kicks off the runtime daemon that coordinates pulling images, creating VMs, managing networking, and all the other plumbing that makes containers work. You’ll need this running before any other container commands will work. To start container now and restart at login:
brew services start container
Running Your First Container
Let’s run an nginx web server to see the container CLI in action. One of the biggest advantages of this CLI over Docker Desktop is per-container VM isolation, which allows us to explicitly allocate CPU and memory:
container run --name web --cpus 2 --memory 2g -p 8080:80/tcp nginx:latest
Here’s what each flag does:
--name web— gives the container a friendly name (web) so you can reference it easily in other commands--cpus 2and--memory 2g— strictly allocates 2 CPU cores and 2GB of RAM to the VM, this is optional (defaults are 4 CPUs and 1GB of RAM if not specified)-p 8080:80/tcp— maps port8080on your Mac to port80inside the container, using TCP. This is how you’ll access the nginx web server from your browser orcurlnginx:latest— the OCI container image to run
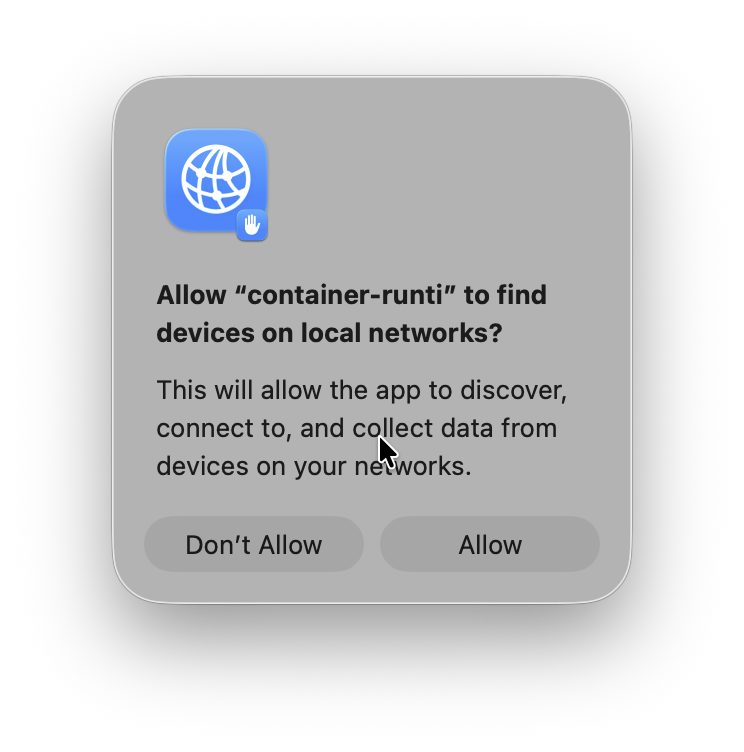
NOTE: When you run your first container, macOS may show a permission prompt asking whether to allow local network access. If you see this, click Allow:
Once the container is up, test it with curl:
curl http://localhost:8080
If everything is working, you’ll see the nginx welcome page HTML in your terminal. If you get an empty reply instead, don’t panic — jump to the troubleshooting section below.
Viewing Logs
To see what’s happening inside your running container, use the logs command:
container logs -f web
The -f flag follows the log stream in real-time (similar to tail -f), so you’ll see new log entries as they happen. This is particularly handy for debugging — try hitting http://localhost:8080 in another terminal and watch the access log entries appear.
Press Ctrl + C to stop following the logs.
Accessing the Container (IP & Embedded DNS)
Container IP Address
Besides the port-mapping approach (-p 8080:80/tcp), you can also access the container directly using its IP address. Each container gets its own IP on a private network managed by the runtime.
First, find the container’s IP address using container inspect and jq:
➜  container inspect web | jq '.[0].networks[0].ipv4Address'
"192.168.64.9/24"
Now you can curl the container directly on port 80 (no port mapping needed):
➜  curl 192.168.64.9
<!DOCTYPE html>
<html>
<head>
<title>Welcome to nginx!</title>
<style>
html { color-scheme: light dark; }
...
<h1>Welcome to nginx!</h1>
<p>If you see this page, the nginx web server is successfully installed and
working. Further configuration is required.</p>
...
<p><em>Thank you for using nginx.</em></p>
</body>
</html>
This is useful when you want to hit the container on its native port without setting up a host-side port mapping, or when you’re running multiple containers and want to reach them on the same port without conflicts.
NOTE: The container’s IP address is on a private network (
192.168.64.0/24) and is only reachable from your Mac — it won’t be accessible from other machines on your network.
Embedded DNS
Instead of relying strictly on IP addresses, Apple’s container CLI also includes an embedded DNS service. You can create a local DNS resolution for your containers:
sudo container system dns create dev.local
container system property set dns.domain dev.local
Now you can access your container using web.dev.local instead of the IP address:
➜  curl web.dev.local
<!DOCTYPE html>
<html>
<head>
<title>Welcome to nginx!</title>
<style>
html { color-scheme: light dark; }
...
<h1>Welcome to nginx!</h1>
<p>If you see this page, the nginx web server is successfully installed and
working. Further configuration is required.</p>
...
<p><em>Thank you for using nginx.</em></p>
</body>
</html>
Troubleshooting: Empty Response from curl
This is the issue that caught me off guard the first time. After starting the nginx container and mapping the port, I ran curl and got this:
➜  curl localhost:8080
curl: (52) Empty reply from server
No error from the container itself, no obvious misconfiguration — just an empty reply.
The Cause
The culprit is macOS’s Local Network firewall. By default, macOS blocks applications from communicating over the local network, and this includes traffic between curl (or your browser) and the container runtime. If you didn’t see the permission prompt when you first ran the container, or if you clicked Don’t Allow, that’s likely why you’re getting an empty response.
The Fix
Here’s how to resolve it:
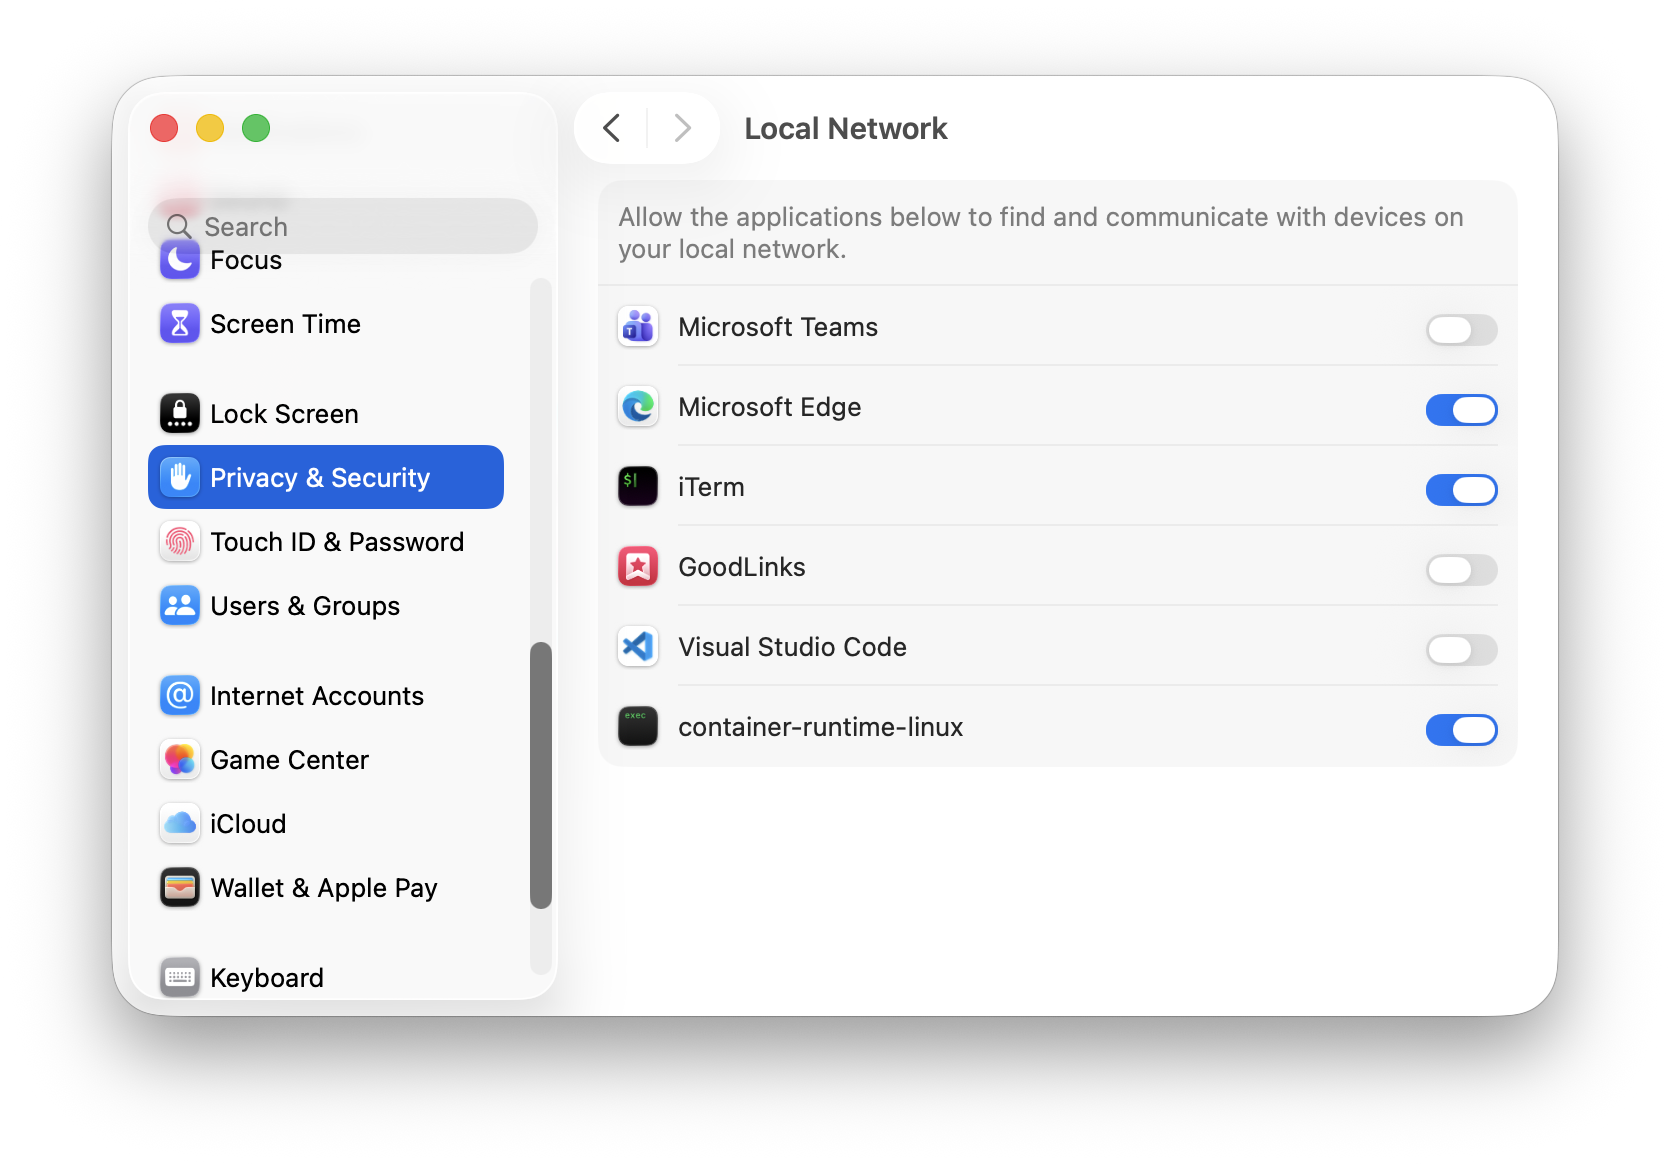
- Open System Settings → Privacy & Security → Local Network
- Find your terminal app or browser (e.g., Microsoft Edge, Safari, Chrome) in the list and toggle it ON
- Find container-runtime-linux in the list and toggle it ON as well
- Fully quit your browser using
Command ⌘ + Q(not just close the window) and reopen it for the changes to take effect
NOTE: You need to enable Local Network access for both the application making the request (your browser or terminal) and the container runtime itself. Missing either one will result in the empty reply error.
Verification
After applying the fix, run curl again:
➜  curl localhost:8080
<!DOCTYPE html>
<html>
<head>
<title>Welcome to nginx!</title>
<style>
html { color-scheme: light dark; }
...
<h1>Welcome to nginx!</h1>
<p>If you see this page, the nginx web server is successfully installed and
working. Further configuration is required.</p>
...
<p><em>Thank you for using nginx.</em></p>
</body>
</html>
You should now see the full nginx welcome page HTML. The container is running and accessible.
Conclusion
Apple’s container CLI is a refreshing addition to the macOS developer toolkit. It gives you native, lightweight Linux containers powered by Virtualization.framework — no Docker Desktop required. The sub-second startup times and tight OS integration make it a joy to use for local development.
That said, the project is still evolving (it’s pre-1.0 at the time of writing), so expect rough edges and breaking changes. But the foundation is solid, and it’s exciting to see Apple investing in first-party container tooling for macOS.
Give it a try and see how it fits into your workflow!